• Welcome to the new and improved Building Code Forum. We appreciate you being here and hope that you are getting the information that you need concerning all codes of the building trades. This is a free forum to the public due to the generosity of the Sawhorses, Corporate Supporters and Supporters who have upgraded their accounts. If you would like to have improved access to the forum please upgrade to Sawhorse by first logging in then clicking here: Upgrades

Work well done

TheCommish

Registered User
Joined
Sep 27, 2011
Messages
1,866
Location
Charlton Ma
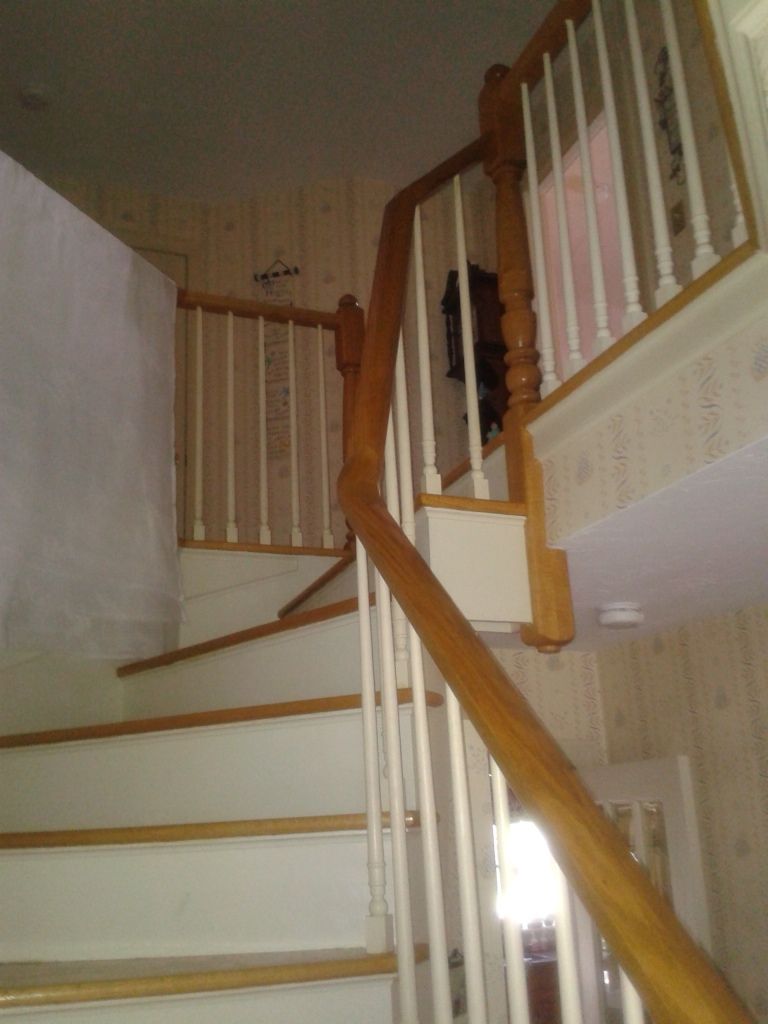
I am starting thread to show work well done; we seem to spend a lot of time bashing the 10% that don't get it, while the vast majority does the work correctly, needing only an occasional nudges in the right directionFor this photo is a set of winders in a renovation of a 1900 home, at that time the work was done the Mass. Code allow 6” spacing between balusters.I usually tell contractors and designers to avoid winders because of the problem with the continuous handrail on the narrow side

View attachment 1699

View attachment 1699

/monthly_2012_05/572953e69be3e_winderrail.gif.ebd9b3e946df70a5d72af33a25bd5579.gif
 
Last edited by a moderator:
I fought with the board to attached the picture, had to keep making it smaller to have it up load, maybe ICE can tell me how to insert photo real size.
 
TheCommish said:
I fought with the board to attached the picture, had to keep making it smaller to have it up load, maybe ICE can tell me how to insert photo real size.
You would need to post the picture to a webhosting site (photobucket.com is the most popular) and then link. The pic size is limited to save server space here (although that is a lot smaller than I usually am able to post - switch to a JPEG and you'lll likely get a larger image)

BTW - great idea on this thread!
 
Commish, great idea!

Try this;

How to Post Pictures on a Forum Go to Photobucket.com or any other photo sharing site then:

1. Register a free account with them. Don't bother entering your cell phone number if they ask for that.

2. Go back to the PhotoBucket home page and click the button that says upload.

3. Click the browse button to browse for the image on your computer then upload it.

4. Look in the lower left hand corner, a thumbnail of your image should be there with a box labled IMG.

Copy this code and paste it directly into your post here on this forum.


]
wooden-spiral-staircase.jpg


Francis
 
GBrackins said:
very nice ....
Daddy-0- said:
Wow Francis...that is cool. There is WAY too much $$ in Albemarle still huh. Were they engineered?
As usual I didn't provide enough information; I apologize for the deception; the photo is courtesy of logstairs.com Was using it to demostrate on how to post pictures differently like ICE.

Didn't mean to sidetrack but TheCommish has a good idea. I too have more pictures of how not to than ingenious work.

Francis
 
Last edited by a moderator:
Thanks, Commish. I would send you photos of my project but I suspect ICE and a few others here are secretely working for the French so I must consider operational security first and last.
 
ok lets see if this works, this is the orignal photo

For this photo is a set of winders in a renovation of a 1900 home, at that time the work was done the Mass. Code allow 6” spacing between balusters.

I usually tell contractors and designers to avoid winders because of the problem with the continuous handrail on the narrow side

WP_000925.jpg


yea thanks Frances
 
Big improvement on the pictures. In post #18 I was able to download the first picture so that I can enlarge it but the second picture won't work. Do you have any idea what you did differently with the last picture?
 
Commish.....on that left side there.....it looks like the bottom edge of the LVL rafters extend past the top plate....where are they bearing?
 
the microlams have a little bit of a birds mouth over the top with fake tails, I wll be looking for hangers on the face of the header microlams, more photo to follow as job progress.
 
ICE said:
Big improvement on the pictures. In post #18 I was able to download the first picture so that I can enlarge it but the second picture won't work. Do you have any idea what you did differently with the last picture?
no, I think I used the the same method
 
That's what I thought it looked like......I've seen skewed down (ridge) hangers, but never skewed up.....do they make them?

TheCommish said:
the microlams have a little bit of a birds mouth over the top with fake tails, I wll be looking for hangers on the face of the header microlams, more photo to follow as job progress.
 
Top